Adding custom Magento CMS Static Blocks to your Magento files is very easy. First, navigate to CMS->Static Blocks in your Magento Admin area. Next, you will want to click on the Add New Block button.
Next, let’s give it a Block Title. This can be anything you want. The Block Title helps you to identify what the static block contains. Next, let’s move on to the Block Identifier. The block identifier is slightly different. This is what we will use to call the block in our template files. The general rule for the block identifier is to use underscores for the spaces which should resemble the Block Title.
For example, if our block title is called “Testing This” our Block Identifier would be “testing_this” without the quotes of course.
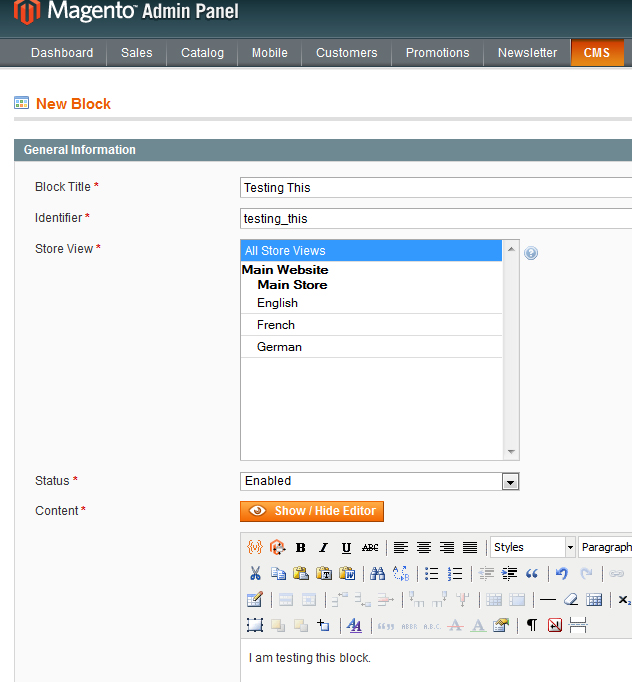
Next, you can select your Store View and set the Status to enabled. Finally, enter your static block content and click the save block template.
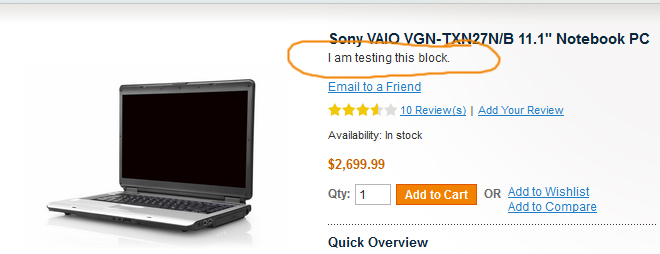
Finally, we will want to add our newly created static block to one of our template files. In this case, we will add our new static block directly below the product name on the product page. To do this we need to edit the view.phtml file found here. app/design/frontend/default/YourTemplateTheme/template/catalog/product/view.phtml.
Here we will add our static block below the product name by adding this to our template file.
getLayout()->createBlock('cms/block')->setBlockId('testing_this')->toHtml() ?>The above code will call our static block. Did you notice the block identifier we created earlier in the round brackets? Finally, save the file and presto; your static block now shows up on the product page!
I hope you enjoyed this post!